Check Processing
With Corpay Cross-Border, you can enter and save the details for all of your checks first, then get a rate and book the deal.
Mandatory fields are indicated by an asterisk (*).
To create a check processing order
-
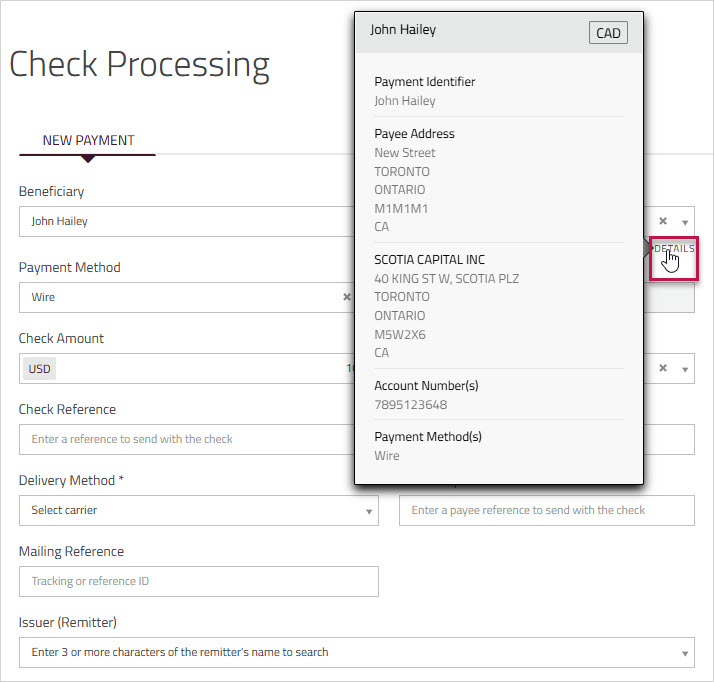
Select the to send the payment. Once you have chosen a beneficiary, you can hover your mouse over the label (just below the field) to view the beneficiary summary.
-
The field displays the preferred method of payment for this beneficiary. However, if more than one method is allowed, you can choose a different method from the dropdown list.
-
Select the for the beneficiary.
Note: The field may not be editable, if it contains information specific to the beneficiary. -
In the field, enter the sum of all the check payments you are submitting. The cheque payments must be in the same currency.
-
Select the for the payment. The beneficiary will receive the amount that results from converting the check currency into the payment currency.
-
Optional In the field, enter any information that you want to include when sending the checks.
-
In the , enter the number of checks that make up the amount entered in step 4.
-
Select the to send the checks.
-
(Optional) Enter the payee reference in the field that you want to include when sending the checks.
-
(Optional) Enter the tracking, or reference ID for the shipment in the field.
-
If applicable, from the dropdown, choose the remitter on whose behalf the payment is being sent. Once you have chosen a remitter, you can hover your mouse over the label (just below the field) to view the remitter summary.
-
Click to save the check payment details. Repeat these steps to add additional payments.
-
When you have added all of your payments, proceed to the section Reviewing and Editing Check Payments.
EXAMPLE
In this scenario, the Payment Currency is CAD and the Check Currency is USD. This means that the order will be settled by $100 in USD, and the beneficiary will receive the amount that results from converting the check amount USD $100 to CAD. The amount the beneficiary receives depends on the conversion rate at the time the order is booked. 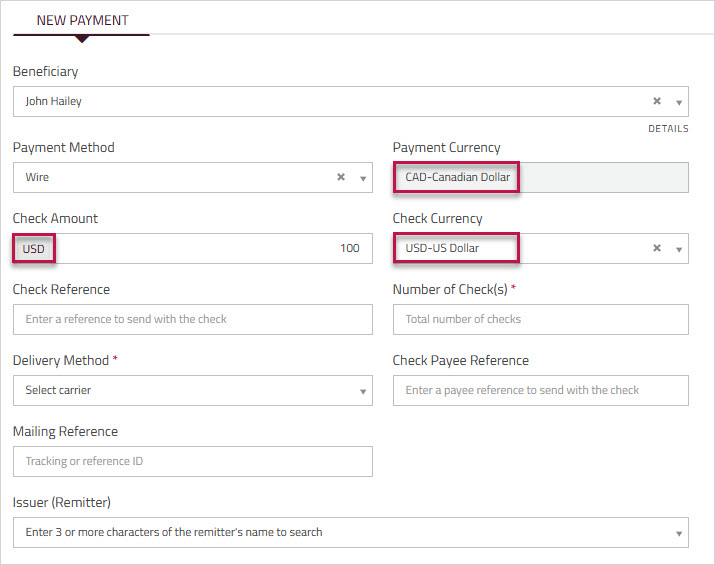
Note: You do not need to submit this form if you choose to scan the checks. Click to submit the checks via our portal (account must be enabled on the portal).