Creating a Forward Limit Order
A Forward Limit Order is similar to a regular Forward Trade, except that the order is only filled if your target rate becomes available before the order's expiry date. Once the Forward Limit Order fills, you can draw down against the forward to make payments to beneficiaries or to your Multi-Currency Account.
Important: A Limit Order is not guaranteed to fill.
To create a Forward Limit Order
- On , click to expand the Limit Order section.
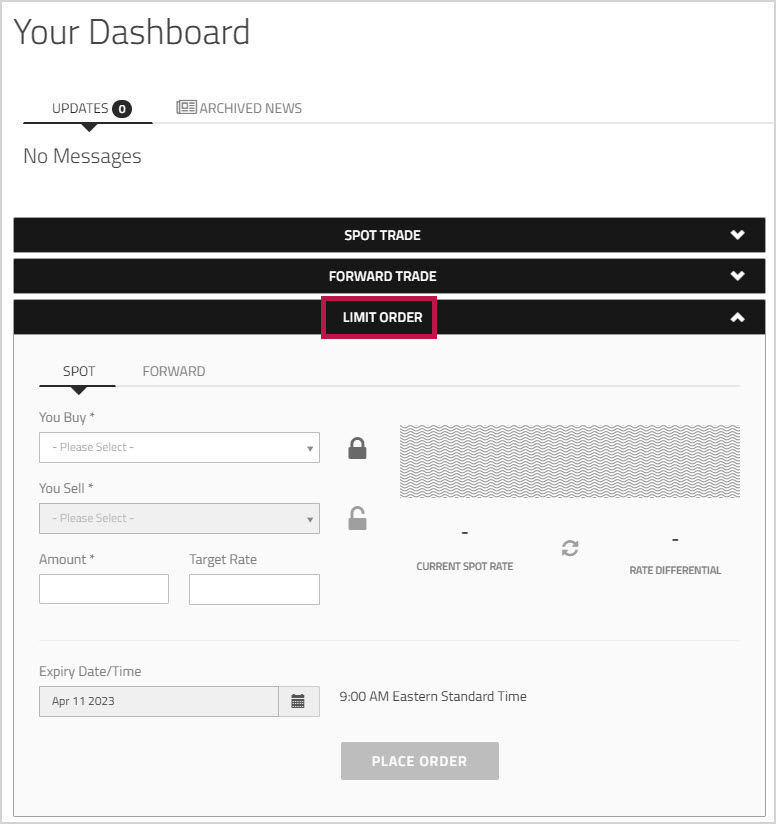
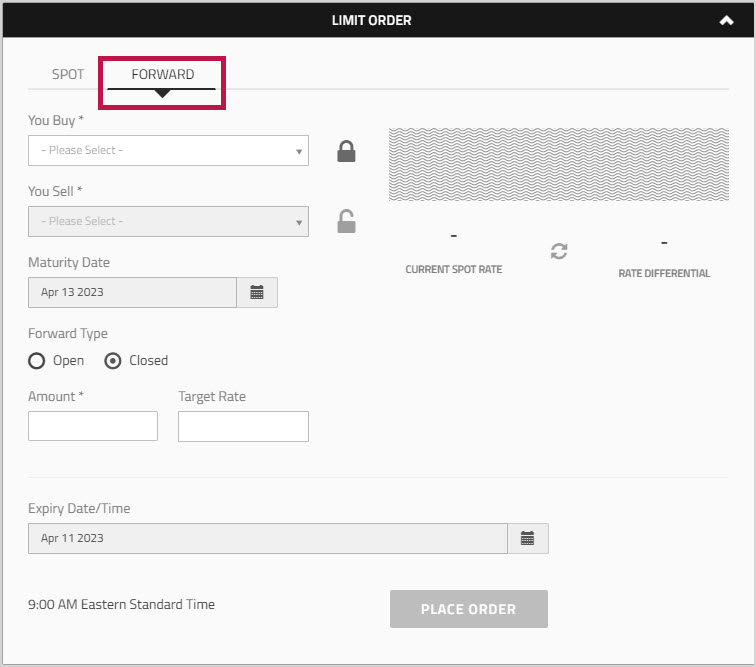
- Click the tab.
- From the dropdown list, choose the currency you want to purchase.
- From the dropdown list, choose the currency you want to use to settle the deal.
- Optionally, use the locked and unlocked icons to determine which currency you want to lock. The value that you enter in the field is considered to be in whichever currency is locked. By default, the currency is the one that is locked. To change the lock setting, click the
 unlocked icon and the unlocked icon changes into a
  locked icon .
 - In the section, click a radio button to choose whether you want to book an Open Forward or a Closed Forward.
- Lets you drawdown against the amount of the order at any time between the Open Date and the Maturity Date.
- Lets you complete the transaction on the Maturity Date at the agreed rate of exchange.
- In the field, click the
 calendar icon and choose the maturity date.
 - If you are booking an Open Forward, the is the last date when you can draw down the funds.
- If you are booking a Closed Forward, the is the date when the funds become available for you to use.
- If you are booking an Open Forward, you will see an additional field called . This field lets you set the first date that you can start drawing down against the booked forward. Click the calendar icon and choose the first date you want the funds to be available.
- In the field, enter the amount of currency that you want to buy.
- Click anywhere on the page to display the .
The Current Spot Rate and the resulting valuation are displayed. By default, the field is autopopulated with the current spot rate. - In the field, specify the rate at which you want the Limit Order to be filled.
Note: If you specify a target rate that would result in a Stop Loss Limit Order, or if the Target Rate you set is outside of the allowed range,you will not be able to book the Limit Order. - Click the
 refresh icon to view the and the updated currency values. The Rate Differential is the difference between your and the .
 - In the, click the calendar icon and choose the date when you want your Limit Order to expire. The time is displayed next to the date field.
- Click .
A message appears at the top of the page to confirm that the order was placed. The order number is displayed at the top of the Limit Order section.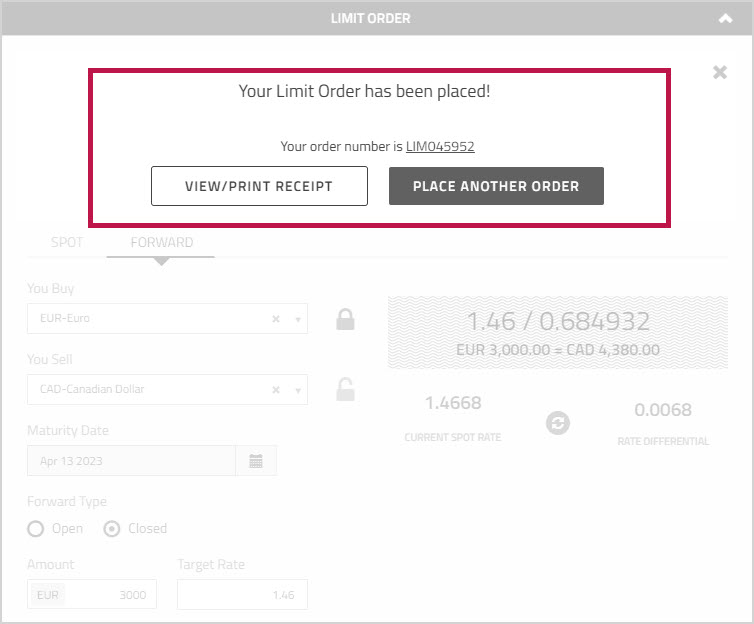
The order appears in the grid at the bottom of on the tab. Its status is . You can click the Deal Number in the grid to view the order.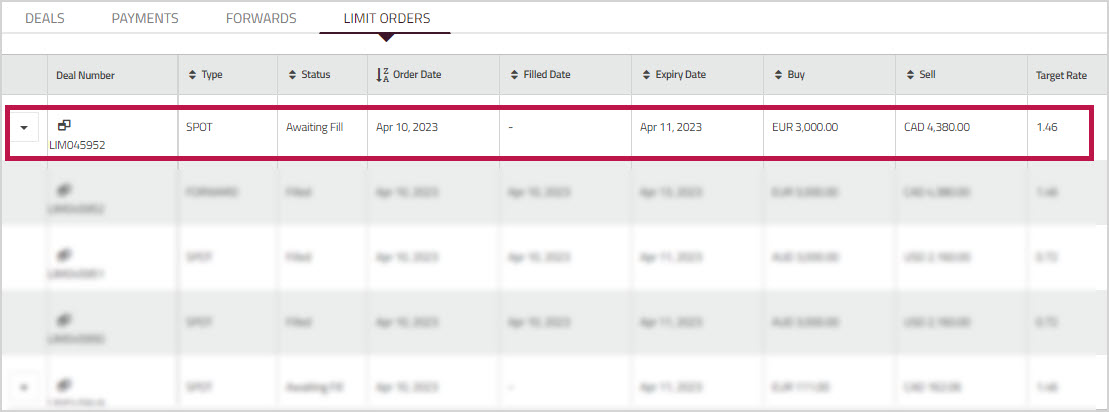
You can click the order number in the confirmation message or in the grid to view the which confirms that the order was placed, or you can click to create another Limit Order. - Proceed to the section Completing a Forward Limit Order.