Inviting multiple payees to Corpay Cross-Border Connections
To invite more than one payee at a time, download the mass invite template, fill in your payees’ email addresses, names, and optional identifiers, and upload the template to send the mass invitations.
Important: Before you invite payees to connect with you, we recommend that you add your logo and signature to the email template. Users with the required permissions, including non-admin users can create and edit email templates. Non-admin users can access the page via the link on the page. Please contact your account representative to enable the invitation template link. For more information, see Creating custom email templates.
To invite multiple payees to Corpay Cross-Border Connections
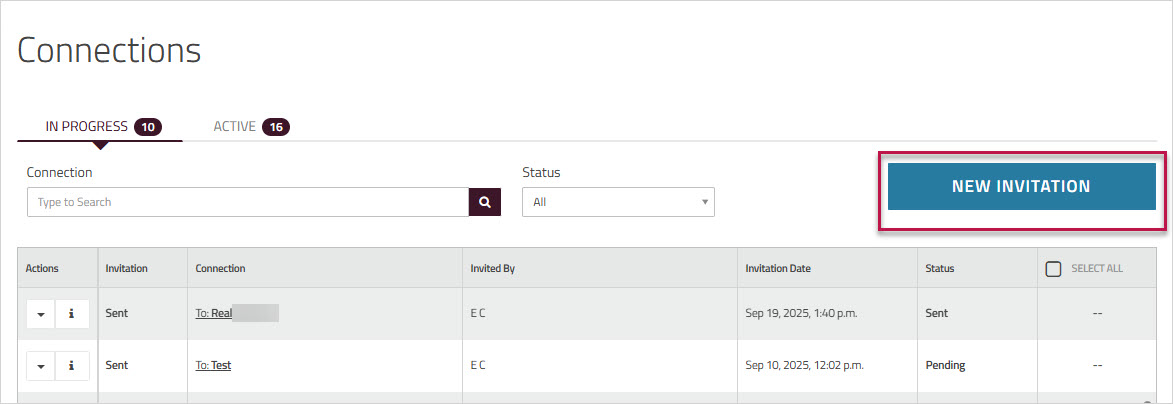
- In the toolbar, under , click
- On the page, click .
- From the dropdown list, choose the template that you want to use. A preview of the selected email appears on the right side of the page.
- Click .
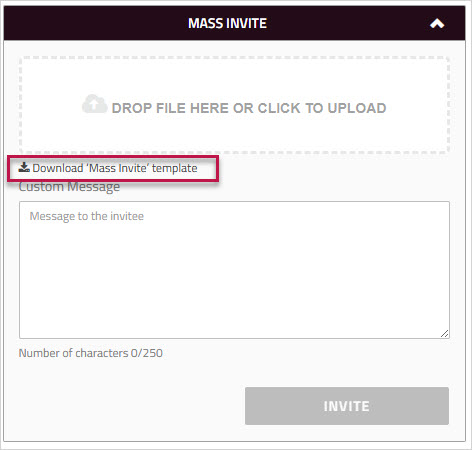
-
Click to download a pre-formatted upload template. Save the file as .csv.
- Each file can contain a maximum of 500 invites.
Important: Do not modify or delete the header row. Doing so, will invalidate the file. - Enter the information in the file:
- : Enter the payee's name .
- : Enter a valid email address.
- : Add a beneficiary identifier in the column. You can enter up to 50 alphanumeric characters. If left blank, the system auto-generates an identifier. Identifier can be updated manually at any time.
- : Enter I for individual payee or C for corporate.
- : Required if inviting Corporate.
- To upload, drag & drop your file, or click anywhere in the upload section to browse and select the file.
Note: Only files are accepted. Uploading a file in any other format will trigger an error. - If there are any data errors in the file, a message will appear indicating the number of invalid entries . See Review and Fix Upload Errors.
- (Optional) In the section, you can enter additional notes. This note won’t be saved to your default email template and will only apply to the current batch of invitations.
- Click to send the mass invitation.
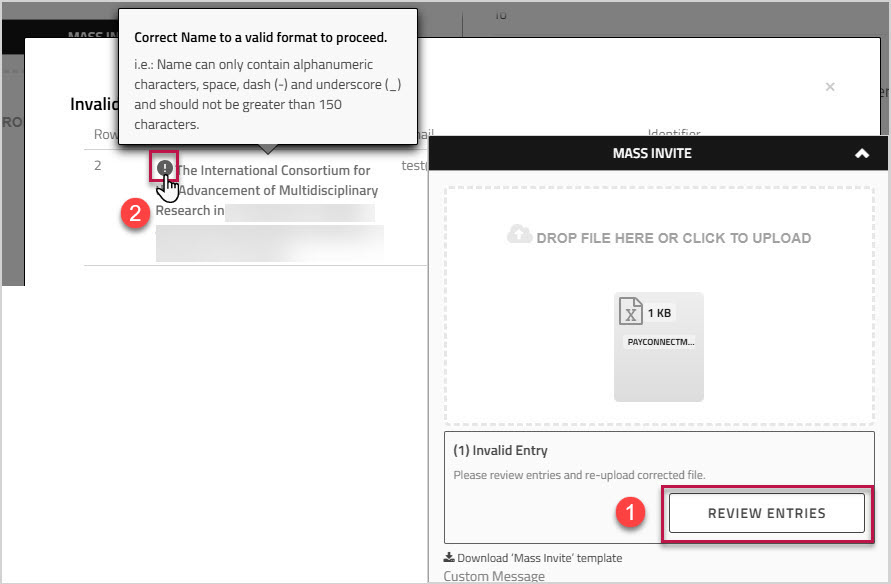
If there are any data errors in the file, you will see a message to review the file entries.
- Click to view the errors.
- In the modal, mouse over the listed entry to view the error. Correct the errors in the file and re-upload.
Some of the common reasons a file might be invalid include:
- Blank or missing fields - Name, Email, Type, Company (for corporate invitations)
- Duplicate names, identifier, or email (same email assigned to multiple payees)
- Invalid email format
- Name exceeds 150 characters or contains invalid characters
- Beneficiary Identifier exceeds 50 characters or contains invalid characters