Fixing issues in an uploaded payment file
When you upload a payment file, the status in the grid indicates whether there are any issues in the file. For full payment files, if there are issues related to beneficiary details, you can either upload another file that has complete information, or you may be able to fix the beneficiary issues without uploading the file again.
Note: When you upload a file that fixes or changes beneficiary name or bank fields, the updated details will be used for all new and existing (but not yet booked) payments. Payments that are already booked will continue to use the original details.
For payment files, the status of fixable files is either a ![]() wrench or a wrench with the word beside it.
wrench or a wrench with the word beside it.
When the status shows the wrench icon along with the word , it means that those payments that did not have any issues were booked, but there are some payments in the file that could not be booked because of issues with the beneficiary data. When you fix the beneficiary issues, the remaining payments will be booked automatically.
In the list on your Dashboard, you will see . When you click on the Action Item, you will be taken to the . The Upload Center grid is filtered to show only those files that require additional beneficiary information before the payments can be processed.
To fix beneficiary issues in an uploaded payment file
- In the , locate the file that contains fixable issues.
- Click in either the column or the column.
The page opens.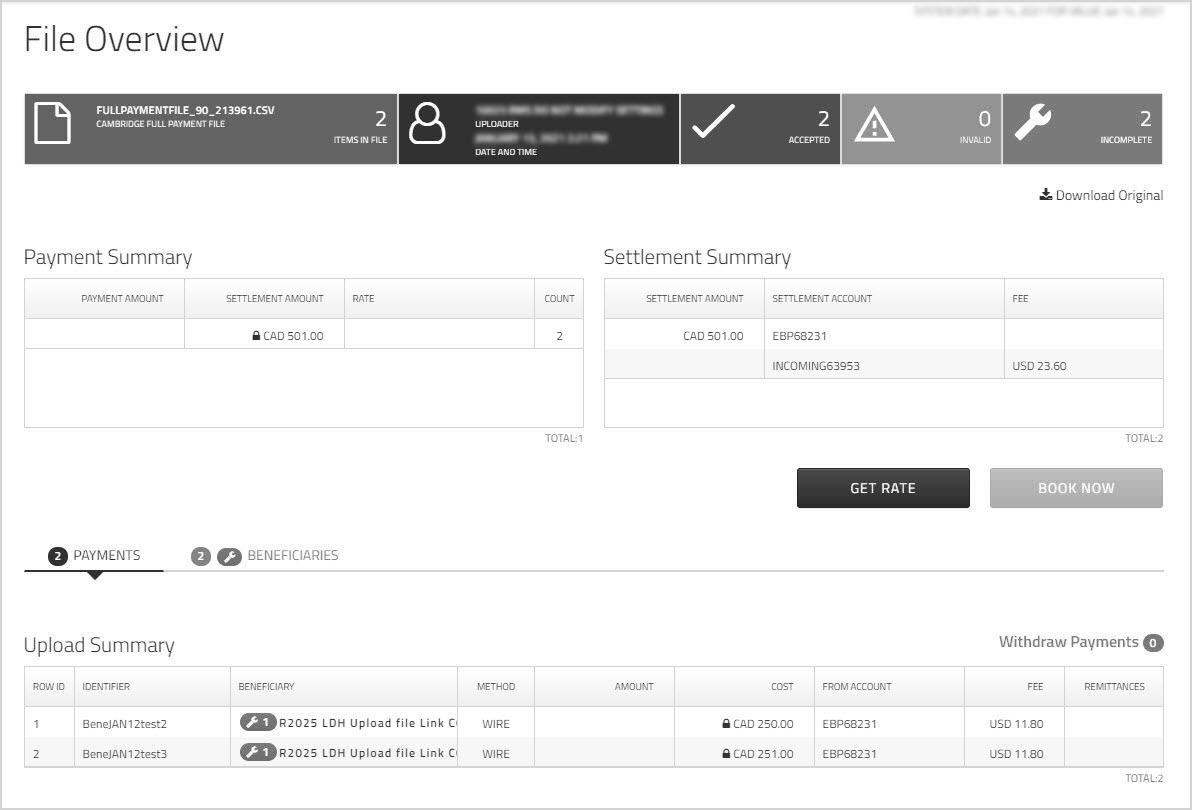
Note: If the complete payments have already been booked, you will not see the and buttons; instead, you will see .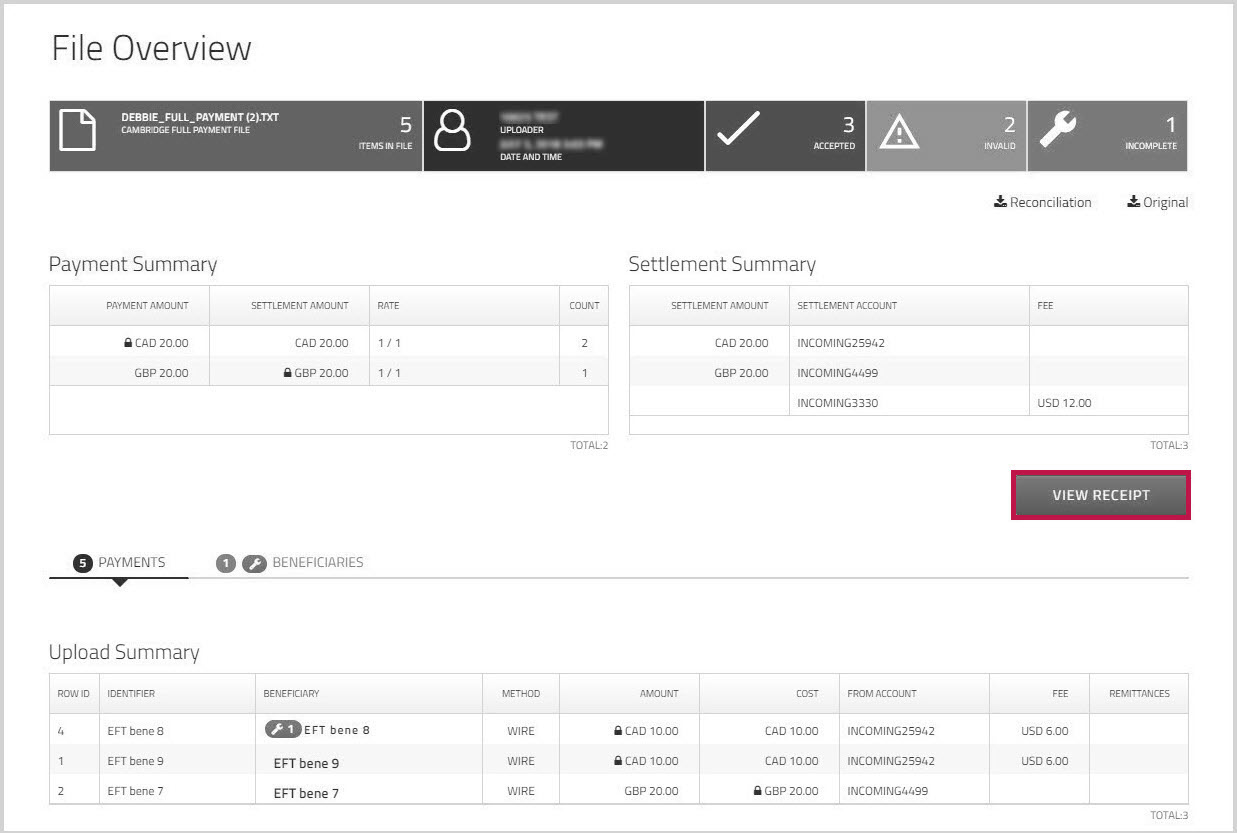
Payment issues
If any of the payment information is invalid, you cannot fix it in the . You will need to fix the file and upload it again. These invalid payments are listed at the bottom of the page. You can click in the column to see a slide-out that displays details about the issues. See Fixing issues in an uploaded drawdown import file.
- Click the
 wrench icon beside the beneficiary name. The number that you see on the icon indicates the number of issues related to that beneficiary.
Alternatively, click the tab, and then, in the column, click the wrench icon.
A slide-out appears that lists the beneficiary issues.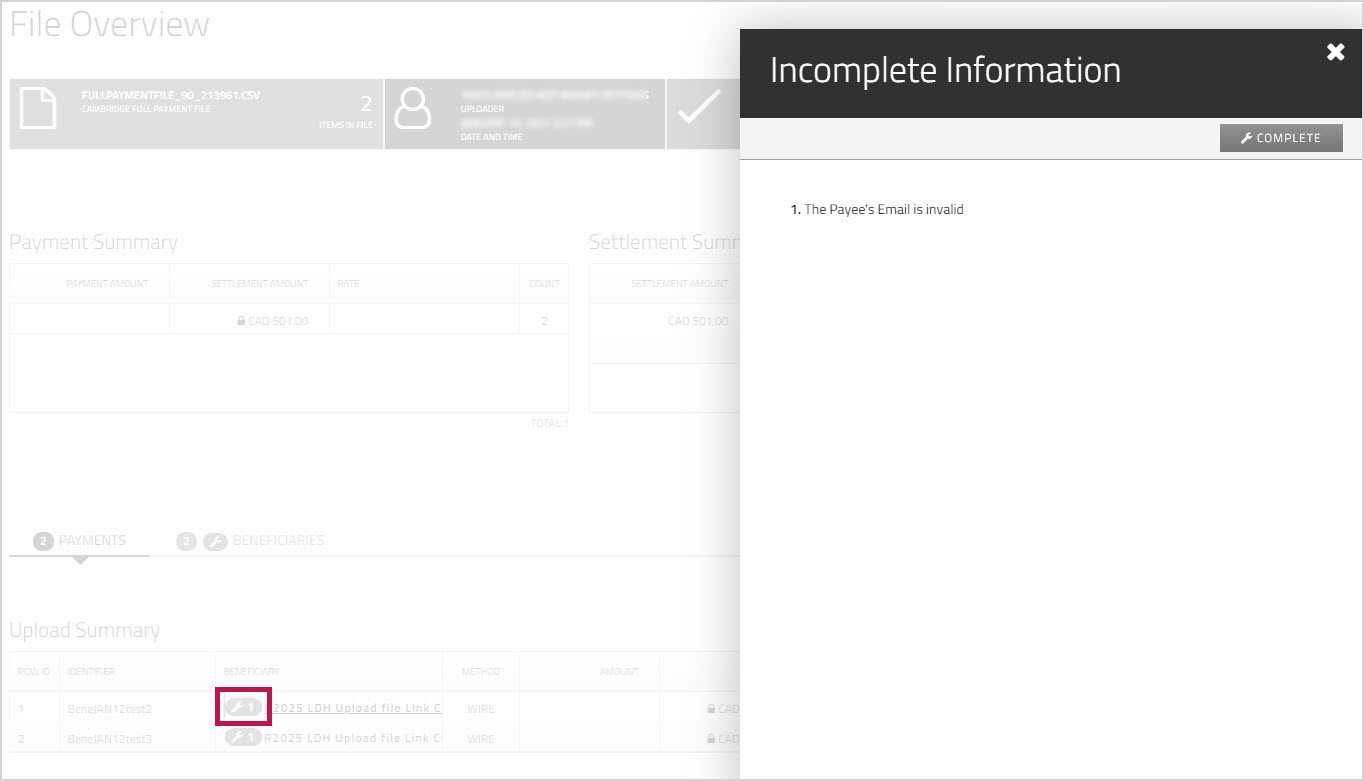
On the slide-out, click .
The template opens to the first section that has missing or incorrect information. For example, if the issue is related to regulatory data, when you click , you will be taken to the section, which is where regulatory details are recorded. The fields that have issues or that are missing required information are outlined in red. - Enter the missing information or correct the issues in the beneficiary template.
- Click .
The updated template is saved, and you are returned to the page. On the tab, the changes to show that the beneficiary is now fixed. The status is if the beneficiary already existed. If this is a new beneficiary, the status is . The number of issues reported on the grid is updated accordingly.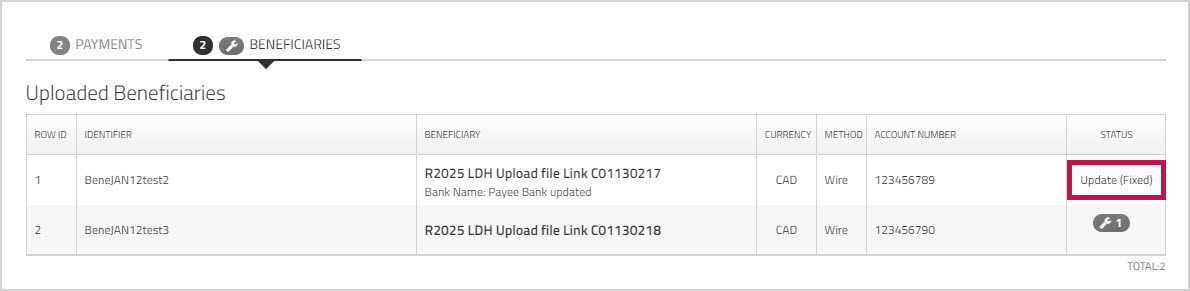
- Repeat these steps to fix any other beneficiary issues.
Drawdown against forward contracts may be rejected if the beneficiary or remitter information is invalid. Below are common reasons for rejection due to incorrect or invalid forward information. To process the rejected payments, you must correct the issues in the file and re-upload it.
| Rejected Reason(s) | Description |
|---|---|
|
Forward Number is required/not found |
A valid forward number must be entered in the file. |
|
Forward is not valid active. |
For open window forwards, today's date must fall between the open date and the maturity date. For closed forwards, today's date must be the maturity date. |
| Sum of drawdowns exceed the forward balance | The sum of drawdowns cannot exceed the total available forward balances. |
| The Payment/Settlement Currency provided is invalid. | The payment and settlement currency must match with the forward payment and settlement currency. |