Creating custom email templates
Corpay Cross-Border provides a default email template that you can modify and use to invite payees to join Connections and share their banking information with you. You add your logo and signature to the template and make changes to the text. You can also create and save additional customized email templates. When you want to send an invitation to a payee, you can choose which template you want to use.
Note: Users with the required permissions, including non-admin users, can create and edit email templates. Non-admin users can access this feature via the link on the Corpay Cross-Border Connections invitation page. For more information, see
To create a custom email template
- In the toolbar, under , click . The first time you use this feature, you should personalize the default template.
Beside the , click the edit icon. If you want to create an additional custom template, click .
 - The page opens. Update the required sections.
Do not edit or delete the placeholder text enclosed by curly brackets . Placeholders will be automatically replaced with system-generated content when the email is sent. For example, will be replaced with a unique Connections portal link for each payee.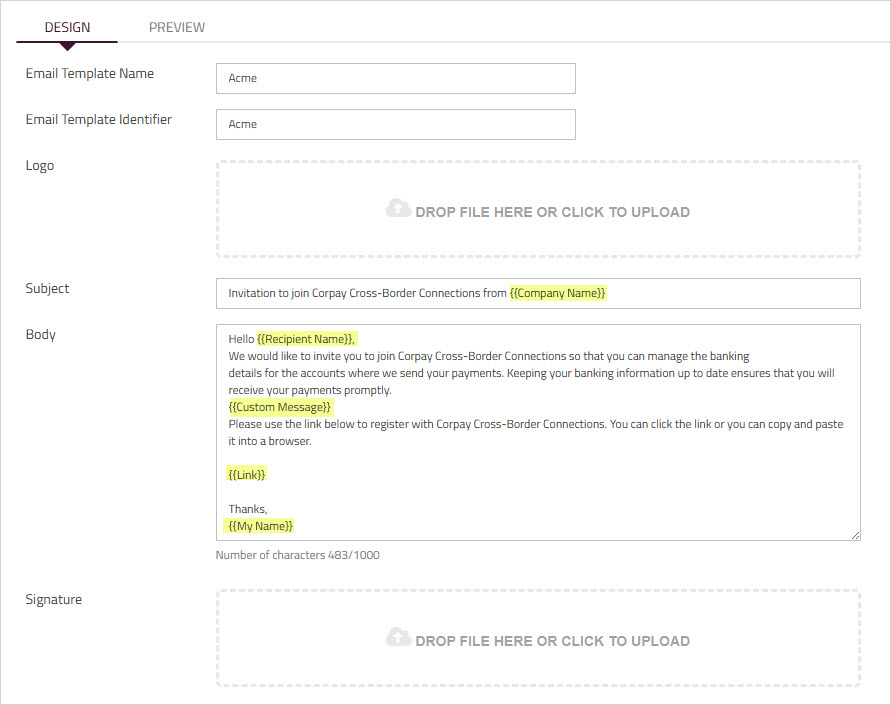
Field Description Email Template Name Enter a name for the template. Email Template Identifier Enter a unique identifier for the template. When you want to send a connection invitation, this is the name that will appear in the dropdown list. You can the email after you enter the identifier. Logo Attach a file that contains your logo. We recommend that you use .png or .jpg format. The logo will appear in the upper right corner of the email.
To upload, drag & drop your file here, or click anywhere in the section to browse and select the file.Subject Enter the text that you want to appear in the line of the email that will be sent when you invite a payee to connect with you. Body This is the body of the email.
When you use this template invite a payee to connect with you, you can further customize the text before you send the invitation.Important: Do not edit or delete the text enclosed in curly brackets .
Signature Attach a file that contains your custom signature. We recommend that you use .png or .jpg format. The signature will appear in the lower left corner of the email.
To upload, drag & drop your file here, or click anywhere in the section to browse and select the file.
Click to view the email layout and ensure the logo is properly sized. If you need to modify the template, use the tab or click to return to the design page. - Click .
- The template is added to the list on the page.
It is also added to the dropdown list on the page. For more information, see Inviting a payee to Corpay Cross-Border Connections.